In this tutorial, Today I will explain to how to create custom order status in Magento 2. Order status is options that will indicates status of your order. There are many order status default provided by Magento 2. But, It also provides functionality to create new order status.
In Store Configuration, You can create new order status and assign it to the order state. So, Let’s follow the below steps to create new order status.
You may also like this :
- How to Enable or Disable Reorders in Magento 2
- How to Get Order Information by Order Id in Magento 2
Steps to Create Custom Order Status in Magento 2 :
Step 1 : Create Custom Order Status
- Login to Admin Panel.
- Go to Stores -> Order Status.
- Click on Create New Status.
- Under the Order Status Information, Fill up details in the fields.
- Save status.
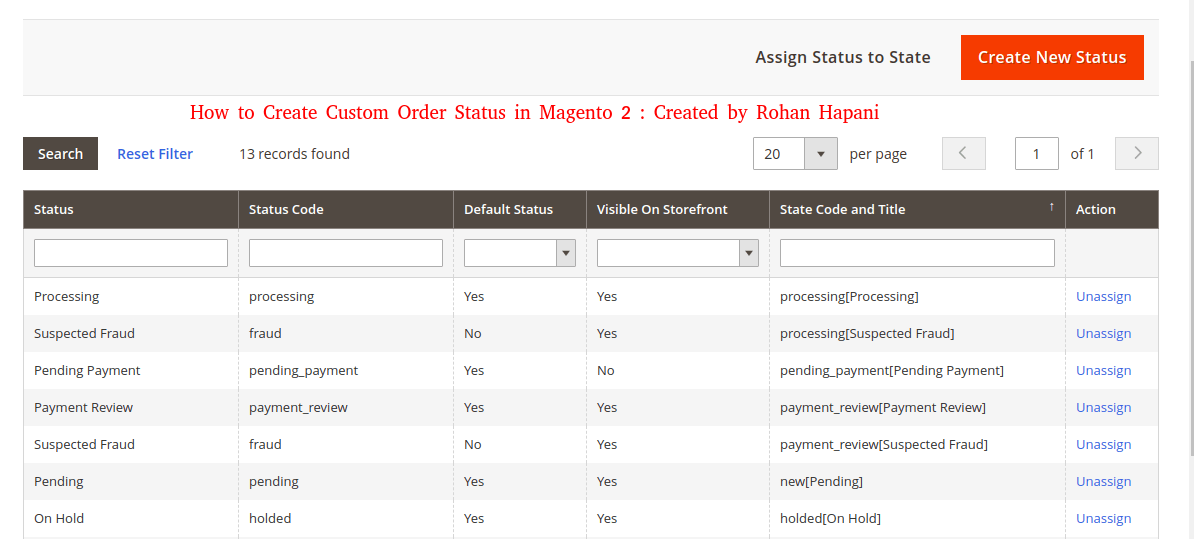
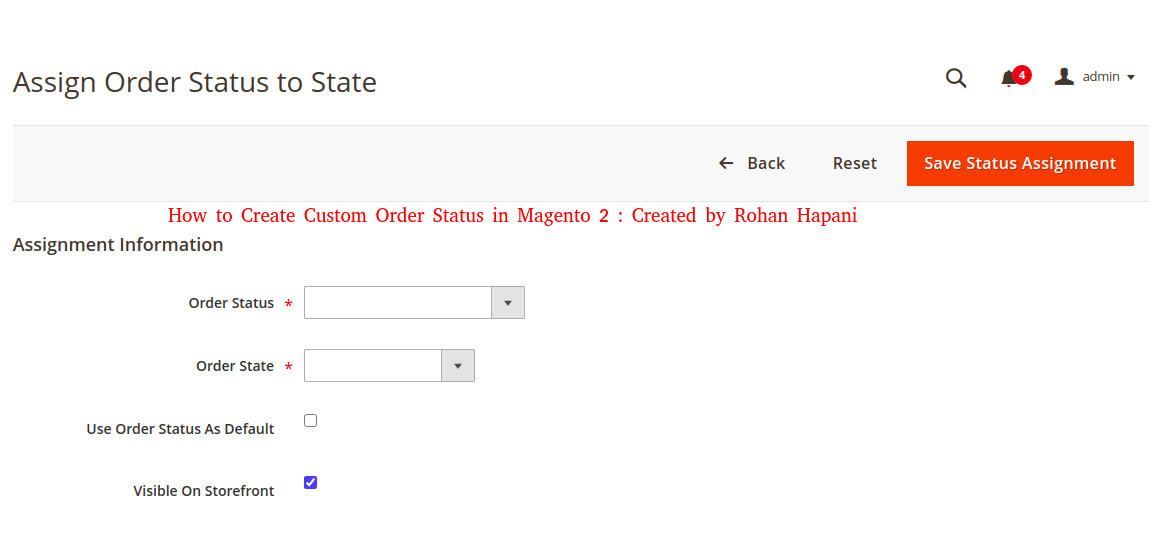
Step 2 : Assign Status to State
- Go to Stores -> Order Status.
- Click on Assign Status to State.
- Under the Assignment Information, Select Order Status from the list to assign.
- Select the Order State to include the Order Status which you’ve assigned.
- Check the checkbox Use Order Status As Default, if you want to set as default order status.
- Check the checkbox Visible On Storefront, if you want to display at storefront.
Step 3 : Custom an existing order status
- Go to order status in the order status list, and edit the page.
- Customize your order status as per requirement.
- Click on Save Status.
Step 4: Delete an order status from the existing state
- Find the order status that you want to unassign in the status list.
- Into the respective row, click Unassign under the Action column.
That’s it !!!
I hope this blog is easy to understand about how to create custom order status in Magento 2. In case, I missed anything or need to add some information, always feel free to leave a comment in this blog, I’ll get back with proper solution.
Stay Safe and Stay Connected !!